Extensions and Plugins
Subtitles and Closed Captions
The PRESTOplay SDK for Android comes with two plugins that support subtitles and closed captions. The default plugin leverages the ExoPlayer subtitles parser and renderer. In addition, the PRESTOplay SDK for Android bundles the Castlabs subtitles plugins, that offers full support for FCC requirements and an extended TTML renderer that provides styling.
In order to use the Castlabs subtitles plugin, you need to add it as a dependency to your application, and register the plugin with the SDK:
dependencies {
    ...
    compile 'com.castlabs.player:subtitles-plugin:4.5.0'
    ...
}
The example above will add the dependency to you build file. You then need to register the plugin to enable it:
PlayerSDK.register(new SubtitlesPlugin());
PlayerSDK.init(getApplicationContext());
Both, the ExoPlayer as well as the Castlabs subtitles plugin style can be
configured through the PlayerContorller. For that, you will need to
create a SubtitlesStyle that can be passed to the
controller. The style can also be loaded from the system settings and the
Builder that creates the style provides the necessary methods to be
initialized from the system settings. Please note that only since Android
API version 21, all required FCC settings can be set on a system level.
Subtitle FCC Fonts
To fulfill the FCC requirements for closed captions, you need to allow the user to select from different fonts, including “casual”, “cursive”, “small capitals”, and a “serif monospace” font. These fonts are not available on all Android devices. The PRESTOplay SDK for Android bundles a module that offers a set of fonts to fill the gap. You can add the module to your dependencies:
dependencies{
    ...
    compile 'com.castlabs.player:subtitles-fonts:4.5.0'
    ...
}
This will bundle the missing font types with your Application. You can also add
different fonts yourself and use the SubtitleFonts class to configure the fonts.
Subtitle Styles
The PRESTOplay SDK for Android contains an example Application subtitle_styles that
demonstrates who you can build a settings view to configure subtitles,
store that configuration in the shared preferences of the Application and
then create a SubtitlesStyle object from these preferences and use it
during playback.
Subtitle Preview
One of the FCC requirements is that you provide a preview when different
caption styles are applied. The PRESTOplay SDK for Android contains a View component,
SubtitlesPreviewView, that can be used
to render a preview of the subtitles with a given style.
Subtitles View
The PRESTOplay SDK for Android uses the SubtitlesView in order to display rendered subtitles.
If you’re using a PlayerView, a SubtitlesView will automatically be created and added to
such PlayerView.
If you are not using a PlayerView. You can create a SubtitlesView programmatically just
by using its constructor, or by declaring one in a layout xml file for the system to inflate. If you
use the latest approach, you must pass your layout View to PlayerController.setComponentView(int, android.view.View)
with the corresponding id, defined in SUBTITLES_VIEW_ID, or
R.id.presto_castlabs_subtitles_view so the SubtitlesPlugin can properly find the SubtitlesView.
You can get a reference to this underlying View in two different ways.
You can use get it from the PlayerController, with its PlayerController.getComponentView(int) method,
again making use of the SUBTITLES_VIEW_ID.
If you’re using a PlayerView there’s also the option of using the
SubtitlesViewComponent, and then
getting the view from it through the getView() method.
Recovering From Loss Of Connectivity
By default, the PRESTOplay SDK for Android will not check specifically for loss of connectivity and if a device looses its internet connection during playback, fatal player errors will be raises. With version 3.1.2, we introduced a new mechanism to enable the player to recover automatically from connectivity loss without fatal errors being raised. You will need to enable that feature explicitly before you initialize the SDK:
PlayerSDK.ENABLE_CONNECTIVITY_CHECKS = true;
If the feature is enabled, the player will catch download errors
internally and check for network connectivity. If no internet connection
is available, a CastlabsPlayerException will be
passed to any registered PlayerListener instances. The type of the error
will be TYPE_CONNECTIVITY_LOST_ERROR,
which indicates that a download error occurred due to lack of
connectivity. The PRESTOplay SDK for Android will then register a broadcast listener and wait
for connectivity changes. During that period, the player might run out of
buffered data and will go into Buffering state. Once device connectivity
changes, the playback will be resumed automatically and
a TYPE_CONNECTIVITY_GAINED_INFO
error will be raised through all registered listeners. This error is not
severe and serves only informational purpose. For more
information about error handling and how to add a listener see
Error Handling.
If you are implementing a user interface component to inform the user of
the loss of connectivity, you might want to consider waiting until the
player goes into buffering state after you observed the
TYPE_CONNECTIVITY_LOST_ERROR
error. If the connectivity loss is short enough and the buffers contain enough
data, the player might actually recover silently from such interruptions.
Handling Connectivity Loss for Live Playback
In case connectivity loss detection is enabled and you are playing live
content, you might need to manually re-start playback if the connection
loss was too long and the playback head moved behind the current live
Window. In that case the player will raise a TYPE_BEHIND_LIVE_WINDOW
error, which can be used as a marker for these situations. A possible re-start
might look like this:
@Override
public void onError(@NonNull CastlabsPlayerException error) {
    // restart playback for live streams that fell behind the live
    // window.
    if (error.getType() == CastlabsPlayerException.TYPE_BEHIND_LIVE_WINDOW) {
        // Save the current playback state to a bundle
        Bundle store = new Bundle();
        controller.saveState(store);

        // release the player and re-open it with the bundle
        controller.release();
        try {
            controller.open(store);
        } catch (Exception e) {
            Log.e(TAG, "Error re-opening stream: " + e, e);
        }
    }
}
Customize Connectivity Check
The PRESTOplay SDK for Android uses its default DefaultConnectivityCheck to check if the
device is currently connected to the internet. The default implementation
does used the Android ConnectivityManager to check basic connectivity
and then ensures that an internet connection is available by doing a DNS
host name lookup to google.com. You can customize the checker
implementation using the global PlayerSDK#CONNECTIVITY_CHECKER setting. You can
either set this to a custom implementation of the
ConnectivityCheck interface, or use
a custom instance of the DefaultConnectivityCheck with a customized
host lookup name.
Please note that the default implementation does not actually open a connection to google.com (or any other lookup host) but does connect to the DNS service of the device to perform a host lookup for the given name.
Offline Keys
The PRESTOplay SDK for Android allows you to store offline keys for some DRM systems. If you
want to leverage this feature, you will need to enable it by setting
a unique identifier as the offline ID in the DrmConfiguration (see
Offline Key Storage).
Once the license is loaded, the offline ID will be used to store
a reference to the key, the so called “keySetId”, on the device. Note that
this is not the actual decryption key, but an identifier used by the DRM
system to find and load the key later. This “keySetId” needs to be stored
and the SDK does this using an implementation of the KeyStore interface. The default implementation
is using your application’s shared preferences in private mode to store
a mapping from your offline ID to the “keySetId”.
You can, however use a custom implementation of the KeyStore. The store
can be configured globally using the
PlayerSDK.DEFAULT_KEY_STORE field. You can
also set it explicitly for a given PlayerController.
Key info
You can get Key related info through the KeyStore
interface. You can get the currently used KeyStore instance with the static
PlayerSDK#DEFAULT_KEY_STORE field.
Providing the offlineId of your content, you can get an instance of DrmKeyStorage
with KeyStore ‘s get method.
The DrmKeyStorage object provides DRM-related for a particular key. You can use this for instance
to get the expiration date.
Interactive Media Ads (IMA)
The PRESTOplay SDK for Android provides with IMA service including Dynamic Ads Insertion (DAI) integrated in the form of plugin. Any VAST-compliant ad server is supported.
IMA plugin needs to be registered and enabled by the app. Optionally the plugin
can be initialized with the custom ImaSdkSettings e.g. in order to change the default ads UI language:
ImaPlugin imaPlugin = new ImaPlugin();
imaPlugin.setEnabled(true);

// (Optional) Set the IMA SDK settings
ImaSdkSettings imaSdkSettings = ImaSdkFactory.getInstance().createImaSdkSettings();
imaSdkSettings.setLanguage("en");
imaPlugin.setImaSdkSettings(imaSdkSettings);

PlayerSDK.register(imaPlugin);

..
// (Optional) Update the IMA settings run-time e.g. on a stream basis
ImaPlugin imaPlugin = PlayerSDK.getPlugin(ImaPlugin.class);
if (imaPlugin != null) {
    ImaSdkSettings imaSdkSettings = imaPlugin.getImaSdkSettings();
    if (imaSdkSettings != null) {
        imaSdkSettings.setLanguage("fr");
        imaPlugin.setImaSdkSettings(imaSdkSettings);
    }
}
Note
Core Library Desugaring Required
The IMA plugin requires core library desugaring to be enabled in your app’s build.gradle:
android {
    compileOptions {
        coreLibraryDesugaringEnabled true
    }
}

dependencies {
    coreLibraryDesugaring 'com.android.tools:desugar_jdk_libs:2.1.5'
}
This is required because the IMA SDK (version 3.37.0+) uses Java 8+ APIs that need desugaring for compatibility with older Android versions.
The PlayerController expects either
ImaAdRequest or
ImaStreamRequest
when opening content video from Bundle (Starting Playback from an Intent) or
PlayerConfig (Starting Playback from a PlayerConfig).
// IMA:
intent.putExtra(SdkConsts.INTENT_ADVERTS_DATA, new ImaAdRequest("https://ima.mydomain/request1").toAdRequest());

// IMA DAI:
// note that specifying content type is mandatory
intent.putExtra(SdkConsts.INTENT_ADVERTS_DATA, new ImaStreamRequest("ContentSourceId", "VideoId", "ApiKey").toAdRequest());
intent.putExtra(SdkConsts.INTENT_CONTENT_TYPE, SdkConsts.CONTENT_TYPE_DASH)
As a result, the PRESTOplay SDK for Android requests the ads, starts the ads playback according to the ads schedule and pauses the content video playback. After the ad is completed the content video playback is resumed automatically.
Additionally the application may need to be notified when the ad starts and completes. For instance, it may disable the user content video playback controls or hide them during the ads playback. In this case the application installs the listener as follows:
PlayerView playerView;
...
playerView.getPlayerController().getAdInterface().addAdListener(new AdInterface.Listener() {
    @Override
    public void onAdStarted(@NonNull Ad ad) {
        Log.d(TAG, "Ad started : " + ad.id + ", position = " + ad.position);
        // May hide controls and disable touch event triggers
    }

    @Override
    public void onAdCompleted() {
        Log.d(TAG, "Ad completed");
        // May show the controls again if we keep them on screen
    }

    @Override
    public void onAdPlaybackPositionChanged(long playbackPositionMs) {
    }
});
Custom ad UI
The PRESTOplay SDK for Android allows you to build your own ad UI. For this, you’ll need to hook up to the relevant
ad events, and hide the default ad provider UI. Additionally, an AdApi
is provided so that ad-related operations can be invoked.
Please note for the IMA Ad Provider the SDK requires the following Tag in the VAST response for Custom UI
to be useable. Once this is available you may check whether the Default AdProvider UI has been disabled
using currentAd.isUiDisabled.
<Extension type="uiSettings">
    <UiHideable>1</UiHideable>
</Extension>
This is how a basic implementation could look:
protected void onCreate() {
    // ...
    customAdUi = new CustomAdUi(playerView.getAdInterface().getAdApi());
    ImaAdRequest adReq = new ImaAdRequest.Builder().tagUrl("<url>")
    // This is a NO-OP in case VAST responses do not have the hideable tag set
                                                            .disableDefaultAdUi(true).get()
                                                            .toAdRequest());
}

protected void onStart() {
    // ...
    playerView.getAdInterface().addAdListener(customAdUi);
}

protected void onStop() {
    // ...
    playerView.getAdInterface().removeAdListener(customAdUi)
}
The CustomAdUi class would implement the AdInterface.Listener interface:
class CustomAdUi implements AdInterface.Listener {
    private AdApi api;
    private Button skipButton;

    CustomAdUi(AdApi adApi) {
        this.api = adApi;
        // Create Views
        // ...
        skipButton.setOnClickListener(new View.OnClickListener() {
            @Override
            public void onClick(View v) {
                adApi.skipAd();
            }
        });
    }

    @Override
    public void onAdStarted(@NonNull Ad ad) {
        // Show UI
    }

    @Override
    public void onAdCompleted() {
        // Hide UI
    }

    @Override
    public void onAdPlaybackPositionChanged(long playbackPositionMs) {
        // Update UI
    }
}
IMA request options
The PRESTOplay SDK for Android’s IMA plugin supports additional options on
Builder to control ad behavior and timeouts:
Builder.playAdsAfterTimeSec(double): Only play ads scheduled at or after the given content time (in seconds). Prerolls and midrolls before this time are skipped. Postrolls will be played even if the value informed is larger than the content duration.Builder.adPreloadTimeoutMs(long): Timeout for ad preloading. Applied ifTIME_UNSETor a value greater than 0 is provided; otherwise the loader’s default of 10 seconds is used.Builder.vastLoadTimeoutMs(int): Timeout for loading VAST. Applied when greater than 0. By default no value is informed to the IMA SDK.Builder.mediaLoadTimeoutMs(int): Timeout for loading ad media. Applied when greater than 0. By default no value is informed to the IMA SDK.Builder.maxMediaBitrate(int): Maximum bitrate for ad media. Applied when greater than 0. By default no value is informed to the IMA SDK.Builder.playAdBeforeStartPosition(boolean): Whether to play an ad scheduled before the content’s configured start position. Default istrue.
ImaAdRequest request = new ImaAdRequest.Builder()
        .tagUrl("<ad_tag>")
        // Skip preroll/early midrolls, start ads from 8s onwards
        .playAdsAfterTimeSec(8.0)
        // Timeouts and media constraints
        .adPreloadTimeoutMs(5000)
        .vastLoadTimeoutMs(4000)
        .mediaLoadTimeoutMs(8000)
        .maxMediaBitrate(2_000_000)
        // Do not play ads that are before the start position
        .playAdBeforeStartPosition(false)
        .get();
Ad Creative Format Fallback
Some ad creative URIs may not contain recognizable file extensions (e.g.,
https://ads.example.com/creative?id=123), making it impossible for the PRESTOplay SDK for Android to
automatically detect the format. By default, the PRESTOplay SDK for Android will attempt to play such
ad creatives as MP4 files, which covers most ad creatives.
You can configure the fallback format globally using
PlayerSDK.AD_SETTINGS:
// Default behavior: use MP4 for undetectable formats (no configuration needed)
// Ad creatives without extensions will be attempted as MP4

// Change fallback to HLS
PlayerSDK.AD_SETTINGS.creativeFormatFallback = SdkConsts.CONTENT_TYPE_HLS;

// Change fallback to DASH
PlayerSDK.AD_SETTINGS.creativeFormatFallback = SdkConsts.CONTENT_TYPE_DASH;

// Disable fallback (strict mode - only play ads with detectable formats)
PlayerSDK.AD_SETTINGS.creativeFormatFallback = SdkConsts.CONTENT_TYPE_UNKNOWN;
The fallback is only used when the ad creative format cannot be detected from the URI.
If the format is successfully detected (e.g., the URI ends with .mp4 or .m3u8),
the detected format will be used instead.
Manual ad Scheduling
The PRESTOplay SDK for Android, when using the IMA Plugin, allows for manual ad scheduling. This enables the user to perform ad requests without the need to inform them on playback start, but rather after playback has already started.
In order to enable this capability, it must be first enabled in the PlayerConfig
or in the Bundle used to start playback.
The AdSchedule configuration object should be
built using the manual value
for the scheduleType.
Alternatively, you can use the AD_SCHEDULE_MANUAL constant.
// Example with Bundle
Bundle bundle = new Bundle();
bundle.putString(SdkConsts.INTENT_URL, "http://example.com/manifest.mpd");
bundle.putParcelable(SdkConsts.INTENT_AD_SCHEDULE, SdkConsts.AD_SCHEDULE_MANUAL);
// ...
playerController.open(bundle);
// Example with PlayerConfig
PlayerConfig playerConfig = new PlayerConfig.Builder("http://example.com/manifest.mpd")
    .adSchedule(SdkConsts.AD_SCHEDULE_MANUAL)
    // ...
    .get();
playerController.open(playerConfig);
In order to perform ad requests, you need to get a reference to the AdInterface.
playerController.getAdInterface().scheduleAd(new ImaAdRequest(adTag).toAdRequest());
By default, ads will be scheduled to be played 1.5 seconds after the response has been received. This is in order to provide a smooth transition into the ad and avoid running in a buffer underrun.
Note
This delay is not intended to schedule ads in advance. The IMA SDK expects the ad to be played shortly after the ad response, and it may completely drop the ad and skip its playback if the delay is too big. For this reason, this value is limited to 5 seconds.
The can be configured on a per-request basis as follows:
playerController.getAdInterface().scheduleAd(new ImaAdRequest.Builder()
                                .tagUrl(adTag)
                                .scheduleDelayMs(4000)
                            .get()
                            .toAdRequest());
Note that there are some limitations when it comes to manual ad scheduling:
No ads can be scheduled while already playing an ad.
Only VAST ads may be requested. If a VMAP is scheduled, it will be ignored.
Already scheduled ads, for instance, with a VMAP AdRequest informed on playback start, will be dropped if an another request is performed.
Downloader
The downloader plugin of the PRESTOplay SDK for Android allows the content to be downloaded and played back offline later on. Currently, the DASH, Smooth Streaming and MP4 content types are supported for the download.
In order to use the Downloader plugin you must show a persistent notification, as it is a foreground
service. This is achieved through the DownloadNotificationProvider
abstract class.
First, the application needs to register the downloader plugin prior to PRESTOplay SDK for Android initialization:
PlayerSDK.register(new DownloaderPlugin(notificationProvider));
PlayerSDK.init(getApplicationContext());
Please note that by default the downloader will permit 10 parallel segment downloads. You can configure this number in the DownloaderPlugin constructor, for example:
PlayerSDK.register(new DownloaderPlugin(notificationProvider, 5));
PlayerSDK.init(getApplicationContext());
The downloader is a foreground service and the applications need to use
DownloadServiceBinder in order to gain access to the downloader:
DownloadServiceBinder downloadServiceBinder;
ServiceConnection downloadServiceConnection = new ServiceConnection() {
    public void onServiceConnected(ComponentName componentName, IBinder iBinder) {
        downloadServiceBinder = (DownloadServiceBinder) iBinder;
    }
    public void onServiceDisconnected(ComponentName componentName) {
        downloadServiceBinder = null;
    }
}
Note
Do not start the service on your own, always interact with it through the DownloadServiceBinder.
The service will automatically start itself when there’s at least one download ongoing and will
stop when there are no pending downloads.
The downloader plugin needs a DownloadNotificationProvider implementation.
This is a sample implementation that will show a progress bar in such notification.
public class NotificationProvider extends DownloadNotificationProvider {

    public NP(int notificationId) {
        super(notificationId);
    }

    @NonNull
    @Override
    public Notification getNotification(@NonNull DownloadServiceBinder downloadServiceBinder, @NonNull Context context) {
        Notification.Builder builder;

        if (android.os.Build.VERSION.SDK_INT >= android.os.Build.VERSION_CODES.O) {
            String id = "content_download_channel";
            createNotificationChannel(context, id);
            builder = new Notification.Builder(context, id);
        } else {
            builder = new Notification.Builder(context);
        }

        builder.setContentTitle(context.getString(R.string.app_name))
                .setAutoCancel(false)
                .setSmallIcon(R.drawable.ic_cloud_download_black_24dp);

        List<Download> downloads;
        try {
            downloads = downloadServiceBinder.getDownloads();
        } catch (Exception e) {
            e.printStackTrace();
            return builder.build();
        }

        long totalSize = 0;
        long downloadedSize = 0;
        boolean allCompleted = true;

        // Compute sum for all downloads
        for (Download download : downloads) {
            totalSize += download.getEstimatedSize();
            downloadedSize += download.getDownloadedSize();
            allCompleted = allCompleted && download.getState() == Download.STATE_DONE;
        }

        if (allCompleted) {
            builder.setContentText("Downloads finished")
                    .setProgress(0, 0, false)
                    .setOngoing(false);
        } else {
            double progress = (double) downloadedSize / totalSize;
            builder.setContentText("Downloading content")
                    .setProgress(100, (int) (100.0 * progress), false)
                    .setOngoing(true);
        }
        return builder.build();
    }
}
The getNotification method will be called after each downloader event (explained below).
If you want to change this behaviour you can override the onDownloadEvent method.
To start with the new download the application provides DownloadService with the Bundle
so that the downloader can fetch and parse the manifest and prepare the
Download model. The Bundle should hold the following keys:
INTENT_URLexpects aString(mandatory),INTENT_DOWNLOAD_IDexpects aString(mandatory),INTENT_DOWNLOAD_FOLDERexpects aString(mandatory),INTENT_DRM_CONFIGURATIONexpects aDrmConfiguration(optional),INTENT_CONTENT_TYPEexpects one ofCONTENT_TYPE_UNKNOWNfor auto-detection,CONTENT_TYPE_DASH,CONTENT_TYPE_SMOOTHSTREAMING, orCONTENT_TYPE_MP4INTENT_HD_CONTENT_FILTERexpects an integer bit fieldINTENT_VIDEO_SIZE_FILTERexpectsPointdefining the video size filter or one ofVIDEO_SIZE_FILTER_NONE,VIDEO_SIZE_FILTER_AUTOINTENT_VIDEO_CODEC_FILTERexpects one ofVIDEO_CODEC_FILTER_NONE,VIDEO_CODEC_FILTER_CAPS
String downloadId = "ID";
File moviesFolder = getExternalFilesDir(Environment.DIRECTORY_MOVIES);
File target = new File(moviesFolder, "Downloads/" + downloadId);

Bundle bundle = new Bundle();
bundle.putString(SdkConsts.INTENT_URL, "MANIFEST_URL");
bundle.putString(SdkConsts.INTENT_DOWNLOAD_ID, downloadId);
bundle.putString(SdkConsts.INTENT_DOWNLOAD_FOLDER, target.getAbsolutePath());

downloadServiceBinder.prepareDownload(context, bundle, new Downloader.ModelReadyCallback() {
    public void onError(@NonNull Exception e) {
        Log.e(TAG, "Error while preparing download: " + e.getMessage(), e);
    }
    public void onModelAvailable(@NonNull Download download) {
        // initiate selection here of video quality, audio and subtitle tracks
        // either automatically or manually
    }
});
The client callback ModelReadyCallback is invoked
when the Download model is ready. Now the desired video quality,
audio and subtitle tracks have to be selected by the application either automatically or manually:
download.setSelectedVideoTrackQuality(0);
download.setSelectedAudioTracks(new int[]{0});
And finally the download needs to be registered in the downloader and optionally started:
downloadServiceBinder.createDownload(download, true);
The downloader keeps the list of downloads with states and each download can be paused, resumed and deleted independently:
List<Download> downloads = downloadServiceBinder.getDownloads();

downloadServiceBinder.pauseDownload(downloads.get(0).getId());
downloadServiceBinder.resumeDownload(downloads.get(0).getId());
downloadServiceBinder.deleteDownload(downloads.get(0).getId());
Note that createDownload,
deleteDownload,
resumeDownload and
pauseDownload are asynchronous and the results are broadcasted using LocalBroadcastManager.
The following messages reflecting the downloader state change are defined:
When targeting Android 15 (API 35) and higher, the system imposes time limits for background services
of type dataSync, which the DownloadService uses. If this limit is hit the service will
automatically pause any ongoing downloads and immediately stop itself. It is then the responsibility
of the application to resume any paused downloads when the app returns to the foreground.
IntentFilter filter = new IntentFilter();
filter.addCategory(MessageHandler.INTENT_DOWNLOAD_CATEGORY);
filter.addAction(MessageHandler.ACTION_DOWNLOAD_ERROR);
filter.addAction(MessageHandler.ACTION_DOWNLOAD_STOPPED);
filter.addAction(MessageHandler.ACTION_DOWNLOAD_CREATED);
filter.addAction(MessageHandler.ACTION_DOWNLOAD_STARTED);
filter.addAction(MessageHandler.ACTION_DOWNLOAD_DELETED);
filter.addAction(MessageHandler.ACTION_DOWNLOAD_COMPLETED);
filter.addAction(MessageHandler.ACTION_DOWNLOAD_NO_PENDING);
filter.addAction(MessageHandler.ACTION_DOWNLOAD_STORAGE_OK);
filter.addAction(MessageHandler.ACTION_DOWNLOAD_STORAGE_LOW);
filter.addAction(MessageHandler.ACTION_DOWNLOAD_PROGRESS);
filter.addAction(MessageHandler.ACTION_DOWNLOAD_PATH_UPDATE);
filter.addAction(MessageHandler.ACTION_DOWNLOAD_SERVICE_TIMEOUT);

LocalBroadcastManager.getInstance(context).registerReceiver(new BroadcastReceiver{
    public void onReceive(Context context, Intent intent) {
        String downloadId = intent.getStringExtra(MessageHandler.INTENT_DOWNLOAD_ID);
        Log.d(TAG, "Message: " + intent.getAction() + ", download Id: " + downloadId);
        switch (intent.getAction()) {
            case MessageHandler.ACTION_DOWNLOAD_STOPPED:
                break;
            case MessageHandler.ACTION_DOWNLOAD_CREATED:
                break;
            case MessageHandler.ACTION_DOWNLOAD_STARTED:
                break;
            case MessageHandler.ACTION_DOWNLOAD_DELETED:
                break;
            case MessageHandler.ACTION_DOWNLOAD_COMPLETED:
                break;
            case MessageHandler.ACTION_DOWNLOAD_NO_PENDING:
                break;
            case MessageHandler.ACTION_DOWNLOAD_ERROR:
                break;
            case MessageHandler.ACTION_DOWNLOAD_STORAGE_LOW:
                break;
            case MessageHandler.ACTION_DOWNLOAD_STORAGE_OK:
                break;
            case MessageHandler.ACTION_DOWNLOAD_PROGRESS:
                break;
            case MessageHandler.ACTION_DOWNLOAD_PATH_UPDATE:
                break;
            case MessageHandler.ACTION_DOWNLOAD_SERVICE_TIMEOUT:
                break;
            default:
                break;
        }
    }
}, filter);
Note that when the system storage becomes low all the downloads will be paused automatically and message
ACTION_DOWNLOAD_STORAGE_LOW will be sent.
The device storage should then be cleaned up by the application either manually or automatically and the downloads should
be resumed.
The downloader is a sticky service and will continue downloads after the system re-creates it (e.g. when the service process is killed).
To start the playback of the downloaded content the application should follow Starting Playback from an Intent with some additional keys:
Intent intent = new Intent(this, PlayerActivity.class);
intent.putExtra(SdkConsts.INTENT_URL, download.getLocalManifestUrl());
intent.putExtra(SdkConsts.INTENT_DRM_CONFIGURATION, download.getDrmConfiguration());
intent.putExtra(SdkConsts.INTENT_DOWNLOAD_FOLDER, target.getAbsolutePath());
The downloader will always download one asset (movie) at a time. The reasoning for this behaviour is that, assuming constant bandwidth for all the assets, the amount of time for all the downloads to complete would be equal regardless they’re downloaded either sequentially or in parallel. In addition, with sequential downloading, the first asset will be ready for playback sooner and should the connection be lost, only one download would be affected.
Scoped Storage
With the introduction of Android 10 (API 29), the concept of “scoped access” has been introduced by Google (link).
On Android 10 and higher, all apps by default get access to this mode without any additional permissions. Scoped storage allows them to access the Media of the device through the media store API, in addition to an app-specific directories.
There’s is the possibility to keep the old permission behaviour on API 29, if the application sets
the requestLegacyExternalStorage flag to true in the manifest.
This flag only serves for API 29, and will be ignored if the targetSdk is set to API 30 or higher.
Your app is affected by change if your downloads are not in one of the directories returned by the following methods:
If you’re using any other path, and you update to targetSdk 30, access to those downloads will
be lost.
You can take care of migrating the existing Downloads to a scoped storage path on your own, and
updating the reference for those in our SDK. You can do this through the
updateDownloadPath
method. Note that this method will not migrate the files themselves.
We are also currently working on bringing to the Downloader additional helper methods to ease migration of data. Those will be published on a later release.
Even if you choose not to do the Downloads migration now, it is highly recommended to start using one of the aforementioned methods to retrieve a scoped storage path in order to save the new Downloads into.
For this reason the SDK will, by default, refuse to download anything into a path which is not part
of the scoped storage locations. This behaviour can be disabled by setting allowNonScopedStorageDownload
to true if needed, but we encourage you not to do so.
Request and Response Modifiers
The Downloader exposes hooks that let you inspect or adjust every network request/response through the
RequestModifier and
ResponseModifier interfaces.
// Global modifiers
RequestModifier requestModifier = new RequestModifier() {
    @NonNull
    @Override
    public Request onRequest(@NonNull Request request) throws IOException {
        request.addHeader("Custom-Header", "Value");
        return request;
    }
};

ResponseModifier responseModifier = new ResponseModifier() {
    @NonNull
    @Override
    public Response onResponse(@NonNull Response response) {
        return response;
    }
};

// Add modifiers
DownloaderPlugin.addRequestModifier(requestModifier);
DownloaderPlugin.addResponseModifier(responseModifier);

// Remove modifiers
DownloaderPlugin.removeRequestModifier(requestModifier);
DownloaderPlugin.removeResponseModifier(responseModifier);

// Scoped modifiers (e.g. only for the provided download id)
DownloaderPlugin.addRequestModifier(new RequestModifier() {
    @NonNull
    @Override
    public Request onRequest(@NonNull Request request) throws IOException {
        // Customise requests for a single download
        return request;
    }
}, RequestModifierFilter.builder().downloadId(downloadId).build());

DownloaderPlugin.addResponseModifier(new ResponseModifier() {
    @NonNull
    @Override
    public Response onResponse(@NonNull Response response) {
        // Inspect responses for a single download
        return response;
    }
}, ResponseModifierFilter.builder().downloadId(downloadId).build());
Modifiers run in the order they were added and synchronously on the network thread, so avoid long running operations inside them.
Every Request and Response
carries a tag. When a call originates from the Downloader this tag is set to the download id,
which makes it straightforward to correlate DRM licence calls or other HTTP traffic with the
underlying asset:
DownloaderPlugin.addRequestModifier(request -> {
    if (Request.DATA_TYPE_DRM_LICENSE == request.type) {
        String downloadId = (String) request.getTag();
        // Apply tenant specific DRM headers for this download
    }
    return request;
});
The same tagging behaviour applies when you trigger explicit licence maintenance via
DownloadServiceBinder.fetchLicense and
DownloadServiceBinder.removeLicense,
ensuring your modifiers observe those flows as well.
Analytics
The PRESTOplay SDK for Android offers plugins to integrate the following third party analytics services:
The integrations use a common interface AnalyticsSession to expose a running session.
Please note though that for the most common use-cases, you will not need
to interact with the analytics session directly. The plugins are
integrated with the player and trigger the calls against the analytics
session automatically.
By default the analytics session is created and started whenever a stream is opened with
open(Bundle).
However, it is also possible to create and start the analytics later, upon play().
This option is useful when the playback does not start automatically and the user has to actively trigger playback start:
// Add the analytics session option
bundle.putInt(SdkConsts.INTENT_ANALYTICS_SESSION_TYPE, SdkConsts.ANALYTICS_SESSION_TYPE_PLAY);
// Add the option not to start playback automatically
bundle.putBoolean(SdkConsts.INTENT_START_PLAYING, false);
All the analytics plugins use AnalyticsMetaData
provided to the PlayerController by the client application either
explicitly through setAnalyticsMetaData,
or through the Intent (see Starting Playback from an Intent for an example
on how to use a Intent to configure the player). The analytics metadata has to be created and passed before starting the playback.
Passing the metadata through the intent:
// Create analytics meta-data
AnalyticsMetaData analyticsMetaData = new AnalyticsMetaData(isLive, assetId);

// Set analytics common values
analyticsMetaData.viewerId = prefs.getUserName();
// ...

// Set analytics custom values
Bundle customValues = new Bundle();
customValues.putString("title", ".....");
customValues.putString("cdn", ".....");
analyticsMetaData.extra.putBundle("media", customValues);

// Set the analytics meta-data
intent.putExtra(SdkConsts.INTENT_ANALYTICS_DATA, analyticsMetaData);
Analytics settings
Global labels used by the analytics integrations can be tweaked through
PlayerSDK#ANALYTICS_SETTINGS.
AnalyticsSettings allows to define the
values to report when no track is selected as well as the DRM labels shared by the analytics plugins.
Example usage:
// Before starting playback
PlayerSDK.ANALYTICS_SETTINGS.disabledSubtitleLabel = "off";
PlayerSDK.ANALYTICS_SETTINGS.drmNameWidevine = "wv-l1";
Session detaching
By default, AnalyticSession are started and stopped automatically by the PlayerController. Sessions start whenever playback starts, and stop whenever content ends or the PlayerController is disposed.
If you want to avoid this, and persist a session beyond the PlayerController lifecycle, you can do the following.
In your teardown code, get the reference to the currently used AnalyticsSession and detach it from the PlayerController before releasing it.
// Keep analytics session, analyticsSession is a class variable
analyticsSession = playerView.getPlayerController().getAnalyticsSession();
if (analyticsSession != null) {
    // Unbind this AnalyticsSession from the PlayerController
    analyticsSession.detachFromController();
}
// Release player
playerView.getPlayerController().release();
While in this state. The AnalyticsSession will be still alive and likely, depending on the analytics provider, sending keep-alive traces.
When you want to re-attach the AnalyticsSession to the PlayerController instance, which can be
the same or a completely new instance, you just need to set it before its open() method.
// Restore ongoing AnalyticsSession
playerView.getPlayerController().setAnalyticsSession(analyticsSession);
try {
    playerView.getPlayerController().open(bundle);
} catch (Exception e) {
    Log.e(TAG, "Error while opening player: " + e.getMessage(), e);
}
If a non-null AnalyticsSession is set, it will be used instead of creating a new session.
The detachFromController
method returns a boolean indicating if the AnalyticsSession could successfully unbind itself from
the PlayerController. Currently only the Youbora and Conviva implementations support session
detaching.
You should never use the same AnalyticsSession concurrently in more than one instance of PlayerController.
Make sure to always call detachFromController() before setting the AnalyticsSession to a new
PlayerController.
Youbora
The PRESTOplay SDK for Android bundles an integration for Youbora, the Analytics Service from Nice People At Work.
If you are coming from a PRESTOplay SDK for Android version 4.1.9 or earlier and want to update your integration refer to the Update from PRESTOplay SDK for Android version 4.1.9 or earlier section.
The plugin and all its dependencies are part of the bundle repository and can be added as a dependency to your application build:
dependencies {
    ...
    compile 'com.castlabs.player:youbora-plugin:4.5.0'
    ...
}
You should also add NPAW’s public Maven repository to your gradle file in order to get their binaries:
repositories {
    ...
    maven { url 'https://artifact.plugin.npaw.com/artifactory/plugins/android/' }
    ...
}
This will add the YouboraPlugin to your project.
You can register the plugin with the SDK.
By default, the Youbora plugin will report only fatal errors to the backend. If you wish to also report the SDK warnings as Youbora non-fatal errors, you have to enable it before registering the plugin:
YouboraPlugin youboraPlugin = new YouboraPlugin(accountCode);
// Optional: Report SDK warnings as Youbora non-fatal errors (default: false)
// youboraPlugin.reportWarnings(true);
PlayerSDK.register(youboraPlugin);
Note that you have to pass a valid Youbora accountCode to the constructor in order to initialize the plugin and get access to the backend service.
In addition, you can use the AnalyticsOptions object to customize
the plugin configuration.
You should create the AnalyticsOptions object and fill it with the desired config. This object
will be later passed to the createMetadata
method.
Please refer to more details about possible options to the Youbora documentation.
By default, the plugin overrides the following global options upon initialization:
accountCodeis always set to the systemId you pass in the plugin constructor
usernameis set toanalyticsMetadata.viewerId
contentIsLiveis set toanalyticsMetadata.live
Also, the following fields may be filled by the plugin, if they are not informed:
content_idinsidecontentMetadatawill be filled withanalyticsMetadata.assetId
contentDurationwill be filled withanalyticsMetadata.durationSeconds
contentResourcewill be filled with PlayerController’sgetPathreturn value
The Youbora documentations lists more options you can pass in the global configuration.
Passing Youbora configuration to the player:
// Create Youbora's AnalyticsOptions object
AnalyticsOptions analyticsOptions = new AnalyticsOptions();

// Set any desired fields
analyticsOptions.setContentTitle("Movie");

// Extra properties
Map<String, Object> properties = new HashMap<>();
properties.put("language", "English");
properties.put("year", "2018");
properties.put("price", "Free");

analyticsOptions.setContentMetadata(properties);

// Create AnalyticsMetadata
AnalyticsMetaData analyticsMetaData = YouboraPlugin.createMetadata(
        false,              // Live or not, will set analyticsMetadata.live
        prefs.getAssetId(), // Unique asset identifier, will set analyticsMetadata.assetId
        analyticsOptions);  // Youbora AnalyticsOptions object

// Set a user ID
analyticsMetaData.viewerId = prefs.getUserName();

// Set the analytics meta-data
intent.putExtra(SdkConsts.INTENT_ANALYTICS_DATA, analyticsMetaData);
In this example, we create the meta-data and then pass it to the Intent Bundle that is used to start playback.
With this meta-data configuration in place and passed to the
PlayerController either through the
Intent Bundle or explicitly trough setAnalyticsMetaData,
the session will be automatically started and stopped.
Youbora Sessions
Youbora also offers application tracking, called Youbora Sessions. For exact details on how to use this service please refer to NPAW’s documentation. In this section we exclusively present the minimum code required to achieve interoperability, and allow Youbora’s library to match the application Session with the video ones generated by the PRESTOplay SDK for Android.
In the Application’s onCreate, when initializing the SDK alongside with the YouboraPlugin,
pass in an instance of the NpawPlugin you will use to perform application tracking.
private static final String YOUBORA_CUSTOMER_KEY = "youboracustomerkey";
// Plugin instance to use for application tracking
NpawPlugin npawPlugin;

@Override
public void onCreate() {
    super.onCreate();

    this.npawPlugin = new NpawPlugin.Builder(this, YOUBORA_CUSTOMER_KEY)
            // ...
            .build();

    YouboraPlugin youboraPlugin = new YouboraPlugin(npawPlugin);

    PlayerSDK.register(youboraPlugin);
}
In case Youbora Sessions are not to be enabled, there’s no need to provide an NpawPlugin
instance to the SDK. Instead, only the customer key is required:
YouboraPlugin youboraPlugin = new YouboraPlugin(YOUBORA_CUSTOMER_KEY);
Note
When using Youbora Sessions, if deviceId shall be informed, it is important to set it
in the AnalyticsOptions before initializing the NpawPlugin. Failure to do so may
result in an autogenerated deviceId being reported to Youbora.
This also implies that the Youbora plugin needs to be initialized with the NpawPlugin instance
instead of the customer key.
AnalyticsOptions options = new AnalyticsOptions();
options.setDeviceId("your_custom_device_id");
NpawPlugin npawPlugin = new NpawPlugin.Builder(this, YOUBORA_CUSTOMER_KEY)
        .setOptions(options)
        .build();

YouboraPlugin youboraPlugin = new YouboraPlugin(npawPlugin);
In case you want to update the NpawPlugin instance once the application has been created, this can
be achieved through the component. This should be done before starting a playback session, but
it is usually not required if the NpawPlugin instance stays the same throughout the whole
application lifecycle.
// (Optional) Set the NpawPlugin to use before opening the PlayerController
// This is not needed if the NpawPlugin instance is the same as set on
// the app's onCreate
YouboraAnalyticsSession component = playerController.getComponent(YouboraAnalyticsSession.class);
component.setPlugin(newNpawPlugin);

playerController.open(...);
Update from PRESTOplay SDK for Android version 4.1.9 or earlier
The PRESTOplay SDK for Android version 4.1.10 updates the Youbora integration to version 6. This introduces some breaking changes that are detailed here.
The Youbora binaries are now distributed in a Maven public repository. So you will need to add NPAW’s repository to your gradle file:
repositories {
    ...
    maven { url 'http://dl.bintray.com/npaw/youbora' }
    ...
}
The Youbora plugin is now configured through a custom configuration object; Options,
instead of a Map.
Refer to the Youbora developers portal for a complete explanation about these Options and how to migrate them to V6; Setting Youbora Options.
You should create the Options object and fill it with the desired config. This object
will be later passed to the createMetadata
method.
Nielsen
The PRESTOplay SDK for Android is integrated with Nielsen service in the form of a plugin. First, the plugin needs to be added as a dependency in the application gradle:
dependencies {
    ...
    implementation 'com.castlabs.player:nielsen-plugin:4.5.0'
    ...
}
Then the plugin is registered and enabled by the application:
PlayerSDK.register(new NielsenPlugin(appId, appName, appVersion, sfCode));
...
NielsenPlugin nielsen = PlayerSDK.getPlugin(NielsenPlugin.class);
if (nielsen != null) {
    nielsen.setEnabled(true);
}
Or the other constructor could be used to make a new instance of NielsenPlugin:
JSONObject config = new JSONObject();
try {
    config.put(NielsenPlugin.CONFIG_KEY_APPID, appId);
    config.put(NielsenPlugin.CONFIG_KEY_APPNAME, appName);
    config.put(NielsenPlugin.CONFIG_KEY_APPVERSION, appVersion);
    config.put(NielsenPlugin.CONFIG_KEY_SFCODE, sfCode);
} catch (JSONException e) {
    e.printStackTrace();
}

NielsenPlugin nielsenPlugin = new NielsenPlugin(config);
The Nielsen plugin benefits from the PRESTOplay SDK for Android integrated with IMA service and provides two use cases out of the box: content with and without IMA advertisements. See an example above on how to use the PRESTOplay SDK for Android plugin integrated with IMA.
The plugin sends content and ads metadata to the Nielsen backend. The content metadata is taken by the plugin from the
AnalyticsMetaData. The advertisements metadata is taken from IMA Ad object.
The plugin uses the following variables to generate the channelInfo:
channelNamewill be filled withanalyticsMetadata.assetId
videoUrlwill be filled withplayerController.getPlayerConfig().contentUrl
And in order to generate the jsonMetadata (in loadMetadata(JSONObject jsonMetadata)):
assetIdwill be filled withanalyticsMetadata.assetId
lengthwill be filled withplayerController.getDuration()
And finally to generate the advertisement metadata:
typeis one ofpreroll,midrollandpostrollaccording toad.position
lengthis equal toTimeUtils.ms2s(ad.durationMs)
assetidis equal toad.id
titleis equal toad.title
However, when needed, the advertisement metadata can be enriched by the client application by implementing and
registering AdClientInterface.Listener:
PlayerView playerView;
...

AdController adController = playerView.getPlayerController().getAdController();
if (adController != null) {
    adController.setClientListener(new AdClientInterface.Listener() {
        @Nullable
        public Bundle onGetMetadata(@NonNull Ad ad) {
            Bundle bundle = new Bundle();
            bundle.putString("cdn", ".....");
            return bundle;
        }
    });
}
It is also possible that instead of the integrated IMA service the client uses its own implementation of an ads provider. In this case, the client needs to take care of content and ads playback switches and the plugin only forwards the ads metadata to the Nielsen backend:
PlayerView playerView;
...

AdController adController = playerView.getPlayerController().getAdController();
if (adController != null) {
    adController.adStarted(new Ad());
    ...
    adController.adSetPlaybackPosition(1);
    adController.adSetPlaybackPosition(2);
    ...
    adController.adCompleted();
}
Note, that in the latter case the ads metadata enrichment is also possible.
Mux
The PRESTOplay SDK for Android is integrated with Mux service in the form of a plugin. First, the plugin needs to be added as a dependency in the application gradle:
dependencies {
    ...
    compile 'com.castlabs.player:mux-plugin:4.5.0'
    ...
}
You also need to add Mux’ Maven repository to your dependencies in gradle:
repositories{
    ...
    maven { url 'https://muxinc.jfrog.io/artifactory/default-maven-release-local/' }
    ...
}
This will add Mux plugin to the project and the plugin can be registered with the PRESTOplay SDK for Android:
MuxPlugin muxPlugin = new MuxPlugin(MUX_ENVIRONMENT_KEY);
PlayerSDK.register(muxPlugin);
Note that you can also omit the Mux ENVIRONMENT KEY in the constructor. If you chose not to inform it,
it must be set in Mux’s CustomerPlayerData right before opening the PlayerController. If the
Environment Key is informed in the CustomerPlayerData passed to the Player, it will override
the one used to create the MuxPlugin.
In addition, you can use the Mux CustomerPlayerData object to add content metadata.
You should create the CustomerPlayerData object and fill it with the desired fields. This object
will be later passed to the createMetadata method.
Please refer to more details about this object to the Mux documentation.
The Plugin will automatically map the following values from AnalyticsMetaData.
videoIsLiveis informed with the value fromanalyticsMetaData.live
videoIdis informed with the value fromanalyticsMetaData.assetId
In addition, the Plugin will try to fill the following fields if they are uninformed:
videoDurationis taken fromanalyticsMetaData.durationSecondsif informed, or from the stream itself otherwise (if available)
videoSourceUrlfilled with PlayerController’sgetPathreturn value
videoStreamTypepossible values are DASH, HLS, MP4, SmoothStreaming and Unknown
The Plugin also reports Mux’s optional renditionchange playback event whenever
FormatChangeListener.onVideoFormatChange(...) is fired while content is playing.
Passing Mux metadata to the player:
// Create MUX CustomerData, fill in metadata
CustomerVideoData videoData = new CustomerVideoData();
videoData.setVideoTitle("Inception");
videoData.setVideoLanguageCode("en");
videoData.setVideoProducer(...);
videoData.setVideoEncodingVariant(...);

// Create MUX PlayerData
CustomerPlayerData playerData = new CustomerPlayerData();
playerData.setViewerUserId("userId");
playerData.setExperimentName(...);

// This will override the key set when creating the MuxPlugin
// Not needed in most cases
playerData.setEnvironmentKey("MUX_ENVIRONMENT_KEY");

CustomerViewData viewData = new CustomerViewData();
viewData.setViewSessionId("viewSessionId");

// (Optional) Set custom dimensions data
CustomData customData = new CustomData();
customData.setCustomData1("customDimensionValue1");

// (Optional) Custom Options
CustomOptions customOptions = new CustomOptions();
//customOptions.setBeaconDomain("beacon.example.domain.com");

// Create CustomerData and pass all data objects
CustomerData customerData = new CustomerData(playerData, videoData, viewData);
customerData.setCustomData(customData);

// Create AnalyticsMetadata
AnalyticsMetaData analyticsMetaData = MuxPlugin.createMetadata(
        false,              // Live or not, will set analyticsMetadata.live
        prefs.getAssetId(), // Unique asset identifier, will set analyticsMetadata.assetId
        customerData,       // CustomerData
        customOptions,      // CustomOptions, or null
        null);              // Already existing AnalyticsMetaData object, or null

// Set the analytics meta-data
intent.putExtra(SdkConsts.INTENT_ANALYTICS_DATA, analyticsMetaData);
In this example, we create the meta-data and then pass it to the Intent Bundle that is used to start playback.
With this meta-data configuration in place and passed to the
PlayerController either through the
Intent Bundle or explicitly trough setAnalyticsMetaData,
the session will be automatically started and stopped.
Conviva
The PRESTOplay SDK for Android is integrated with Conviva analytics service in the form of Conviva plugin. The Conviva plugin is part of the bundle repository and can be added as a dependency in the application gradle:
dependencies {
    ...
    implementation 'com.castlabs.player:conviva-plugin:4.5.0'
    ...
}
This will add Conviva plugin to the project and the plugin can be registered with the PRESTOplay SDK for Android:
ConvivaPlugin convivaPlugin = new ConvivaPlugin(CONVIVA_CUSTOMER_KEY);

if (BuildConfig.DEBUG) {
    HashMap<String, Object> settings = new HashMap<>();
    settings.put(ConvivaSdkConstants.GATEWAY_URL, CONVIVA_TOUCHSTONE_GATEWAY);
    settings.put(ConvivaSdkConstants.LOG_LEVEL, ConvivaSdkConstants.LogLevel.DEBUG);
    convivaPlugin.setSettings(settings);
}

HashMap<String, String> deviceInfo = new HashMap<>();
deviceInfo.put(ConvivaSdkConstants.DEVICEINFO.ANROID_BUILD_MODEL, ".....");
deviceInfo.put(ConvivaSdkConstants.DEVICEINFO.OPERATING_SYSTEM_VERSION, ".....");
deviceInfo.put(ConvivaSdkConstants.DEVICEINFO.DEVICE_BRAND, ".....");
deviceInfo.put(ConvivaSdkConstants.DEVICEINFO.DEVICE_MANUFACTURER, ".....");
deviceInfo.put(ConvivaSdkConstants.DEVICEINFO.DEVICE_MODEL, ".....");
deviceInfo.put(ConvivaSdkConstants.DEVICEINFO.DEVICE_TYPE, ".....");
deviceInfo.put(ConvivaSdkConstants.DEVICEINFO.DEVICE_VERSION, ".....");
convivaPlugin.setDeviceInfo(deviceInfo);

PlayerSDK.register(convivaPlugin);
The Conviva plugin benefits from the PRESTOplay SDK for Android integrated with IMA service and provides with two use cases
out of the box: content with and without IMA advertisements. The content metadata is taken by the plugin from the
AnalyticsMetaData. The advertisements metadata is taken from
IMA Ad object.
The Plugin will automatically map the following values:
ConvivaSdkConstants.FRAMEWORK_NAMEis filled with the value fromSdkConsts.PLAYER_NAME
ConvivaSdkConstants.FRAMEWORK_VERSIONis filled with the value fromPlayerSDK.getVersion()
ConvivaSdkConstants.STREAM_URLis filled with the value fromplayerController.getPath()
ConvivaSdkConstants.ASSET_NAMEis filled with the value fromanalyticsMetaData.assetId
ConvivaSdkConstants.IS_LIVEis filled with the value fromanalyticsMetaData.live
ConvivaSdkConstants.VIEWER_IDis filled with the value fromanalyticsMetaData.viewerId
ConvivaSdkConstants.DURATIONis filled with the value fromTimeUtils.us2s(playerController.getDuration())(If the duration was not valid it will filled withanalyticsMetaData.durationSeconds)
Also the advertisement metadata will automatically map the following values:
ConvivaSdkConstants.AdTypeis determined with the value ofad.streamType(It will be ConvivaSdkConstants.AdType.SERVER_SIDE or ConvivaSdkConstants.AdType.CLIENT_SIDE)
ConvivaSdkConstants.AdPlayeris determined with the value ofad.playerType(It will be ConvivaSdkConstants.AdPlayer.CONTENT or ConvivaSdkConstants.AdPlayer.SEPARATE)
Passing Conviva metadata to the player:
// Create extra tags
Bundle extra = new Bundle();

// Conviva predefined tags
extra.putString(ConvivaAnalyticsSession.META_KEY_APPLICATION_NAME, "My Application Name");
extra.putString(ConvivaAnalyticsSession.META_KEY_DEFAULT_RESOURCE, "...");

// Optional custom tags
Bundle customTags = new Bundle();
customTags.putString("sampleCustomTag", "sampleCustomValue");

// Create analytics meta-data
AnalyticsMetaData analyticsMetaData = new ConvivaPlugin.MetadataBuilder(live, assetId)
        .viewerId("viewerID")
        .contentMetadata(extra)
        .customTags(customTags)
        .get();

// Set the analytics meta-data
intent.putExtra(SdkConsts.INTENT_ANALYTICS_DATA, analyticsMetaData);
By default, Conviva average bitrate metrics include both video and audio bitrate. If audio bitrate should not be included in average bitrate, for example for radio or other audio-only streams, disable it in the metadata builder:
AnalyticsMetaData analyticsMetaData = new ConvivaPlugin.MetadataBuilder(live, assetId)
        .viewerId("viewerID")
        .includeAudioBitrateInAverage(false)
        .get();
With this setting, audio-only streams report average bitrate as 0, while audio/video streams report video average bitrate only. Instantaneous bitrate reporting is unchanged.
The Conviva plugin also exposes the underlying ConvivaVideoAnalytics and ConvivaAdAnalytics instances. This may be useful for an advanced use cases, such as sending custom playback related events.
To send Conviva custom playback related event:
// Get the Analytics session
ConvivaAnalyticsSession convivaAnalyticsSession = playerView.getPlayerController().getComponent(ConvivaAnalyticsSession.class);

if (convivaAnalyticsSession != null) {
    // Fill custom map
    HashMap<String, Object> customData = new HashMap<>();
    customData.put("now", Long.toString(System.currentTimeMillis()));
    customData.put("fizz", "buzz");

    String eventType = "customEvent";

    // Get the ConvivaVideoAnalytics instance
    ConvivaVideoAnalytics videoAnalytics = convivaAnalyticsSession.getVideoAnalytics();

    // Send event
    if (videoAnalytics != null) {
        videoAnalytics.reportPlaybackEvent(eventType, customData);
    }

    // Get the ConvivaAdAnalytics instance
    ConvivaAdAnalytics adAnalytics = convivaAnalyticsSession.getAdAnalytics();

    // Send event
    if (adAnalytics != null) {
        String errorMessage = "...";
        adAnalytics.reportAdFailed(errorMessage);
    }
}
Conviva with SingleControllerPlaylist
When using Conviva integration with a SingleControllerPlaylist, it is important to provide an AnalyticsMetaData object for each item in the playlist. This ensures that Conviva can track each item individually.
Below is an example of how to create a playlist with multiple items, each with its own AnalyticsMetaData for Conviva.
PlayerConfig[] playlistItems = new PlayerConfig[]{
    new PlayerConfig.Builder("http://example.com/stream1.mpd")
            .analyticsMetaData(new ConvivaPlugin.MetadataBuilder(false, "Asset1")
                    .viewerId("viewer123")
                    .get())
            .get(),
    new PlayerConfig.Builder("http://example.com/stream2.mpd")
            .analyticsMetaData(new ConvivaPlugin.MetadataBuilder(false, "Asset2")
                    .viewerId("viewer123")
                    .get())
            .get(),
    new PlayerConfig.Builder("http://example.com/stream3.mpd")
            .analyticsMetaData(new ConvivaPlugin.MetadataBuilder(false, "Asset3")
                    .viewerId("viewer123")
                    .get())
            .get()
};

SingleControllerPlaylist playlist = new SingleControllerPlaylist(playlistItems);
playerController.open(playlist);
Broadpeak
The PRESTOplay SDK for Android is integrated with Broadpeak analytics service in the form of Broadpeak plugin. The Broadpeak plugin is part of the bundle repository and can be added as a dependency in the application gradle:
dependencies {
    ...
    compile 'com.castlabs.player:broadpeak-plugin:4.5.0'
    ...
}
This will add Broadpeak plugin to the project and the plugin can be registered with the PRESTOplay SDK for Android:
BroadpeakPlugin broadpeakPlugin = new BroadpeakPlugin("analytics_url", "nano_cdn_host", "*")

PlayerSDK.register(broadpeakPlugin);

// ...

PlayerSDK.init(getApplicationContext());
The Broadpeak plugin uses takes care of sending player metrics and managing view lifecycle calls as required by the underlying SmartLib class.
The BroadpeakPlugin intercepts the first manifest request, and replaces it with the return value
of SmartLib::getURL. It’s the SmartLib responsibility to perform such Uri redirect. Internally,
the SmartLib uses the domains name list in order to decide whether to actually perform a url redirect
for the current domain or not. This domain list should be set while creating the BroadpeakPlugin,
through its last argument.
Warning
If the default domain names list is used ("*"), all manifest requests will try to be redirected
by the SmartLib. This can introduce a significant delay in start-up time as the SmartLib
tries to resolve the redirect.
Make sure you set the domain names list appropriately, following Broadpeak’s recommendation.
If you want to perform any advanced operations and interact directly with the Broadpeak SDK, you can use the SmartLib class.
In case that the BroadpeakPlugin should be disabled for a playback session, this can be achieved
as follows, before creating the PlayerController:
BroadpeakPlugin broadpeakPlugin = PlayerSDK.getPlugin(BroadpeakPlugin.class);
broadpeakPlugin.setEnabled(false);

// ...

playerView.getPlayerController().open(...);
This way the BroadpeakPlugin can be enabled or disabled at run-time without needing to re-init
the SDK.
The Broadpeak session allows to set custom parameters and options. This is how those can be passed to the player:
// Create Analytics Metadata for Broadpeak
Bundle customParameters = new Bundle();
customParameters.putString("name", "value");
customParameters.putString("pre_startup_time", "in_ms");

// Options
SparseArray<Object> options = new SparseArray<Object>();
options.put(StreamingSessionOptions.GDPR_PREFERENCE, StreamingSessionOptions.GDPR_CLEAR);
options.put(StreamingSessionOptions.USERAGENT_AD_EVENT, "useragent");
options.put(StreamingSessionOptions.SESSION_KEEPALIVE_FREQUENCY, 5000);

AnalyticsMetaData analyticsMetaData = new BroadpeakPlugin.MetadataBuilder(live, assetId)
        .customParameters(customParameters)
        .options(options)
        // Optional: Disable precache
        //.precache(false)
        .get();
put(SdkConsts.INTENT_ANALYTICS_DATA, metadata);

// Set the analytics meta-data
intent.putExtra(SdkConsts.INTENT_ANALYTICS_DATA, analyticsMetaData);
In this example, we create the meta-data and then pass it to the Intent Bundle that is used to start playback.
Please check the Broadpeak documentation for a complete list of the available parameters and options.
Broadpeak SSAI Ads
The Broadpeak plugin integrates server-side ad insertion (SSAI) tracking with SmartLib.
Once the BroadpeakPlugin
is registered and ad tracking is enabled, playback state is reported to SmartLib and
SSAI ad state is surfaced through the PRESTOplay SDK for Android’s ad interfaces.
Ad data is provided by SmartLib (out of band) and associated with the current content session by the plugin.
To enable the integration, simply turn on ad tracking right after the BroadpeakPlugin creation:
BroadpeakPlugin plugin = new BroadpeakPlugin(C.BROADPEAK_ANALYTICS_URL, null, "*");

// Enable Broadpeak SSAI ad tracking
BroadpeakPlugin.adTracking = true;

PlayerSDK.register(plugin);
// ...
PlayerSDK.init(getApplicationContext());
The Broadpeak SSAI integration also listens to playlist changes and keeps ad tracking aligned with the currently active item.
If you build a custom ad UI, use the available ad API from the player ad interface for actions such as skip or clickthrough. For clickthrough flows, notify the ad provider first and then handle opening the click URL in your app.
// Assume currentAd is captured from AdInterface.Listener#onAdStarted
AdApi adApi = playerController.getAdInterface().getAdApi();
if (adApi != null && currentAd != null && currentAd.clickthroughUrl != null) {
    adApi.clickthrough(); // Notify Broadpeak
    startActivity(new Intent(Intent.ACTION_VIEW, Uri.parse(currentAd.clickthroughUrl)));
}
Note that, due to a player limitation, if using client-side through the IMA integration
(see ImaPlugin), those are not compatible with Broadpeak
SSAI streams.
BroadpeakSdkElementExtension
The BroadpeakSdkElementExtension allows integration of Broadpeak SDK functionality with the StandaloneThumbnailProvider. This extension enables fetching thumbnails from streams through Broadpeak’s CDN if needed, and supports setting custom Broadpeak metadata, including custom parameters and options for the Broadpeak session.
Here’s how to use the extension with a StandaloneThumbnailProvider:
// Create a StandaloneThumbnailProvider
PlayerConfig config = new PlayerConfig.Builder(streamUrl).get();
StandaloneThumbnailProvider provider = StandaloneThumbnailFactory.getProvider(config);

// Create custom parameters and options
Bundle customParameters = new Bundle();
customParameters.putString("name", "value");

SparseArray<Object> options = new SparseArray<>();
options.put(StreamingSessionOptions.GDPR_PREFERENCE, StreamingSessionOptions.GDPR_CLEAR);

// Create Broadpeak analytics metadata
AnalyticsMetaData broadpeakMetadata = new BroadpeakPlugin.MetadataBuilder(isLive, assetId)
        .customParameters(customParameters)
        .options(options)
        // Optional: Disable precache
        .precache(false)
        .get();

// Add the extension with metadata
provider.addExtension(new BroadpeakSdkElementExtension(broadpeakMetadata));

// Prepare the provider
provider.prepare();
Adobe
The PRESTOplay SDK for Android is integrated with Adobe Mobile Services SDK in the form of a plugin.
Adobe’s SDK allows for tracking app navigation events, alongside with video tracking events. This integration takes care of the later of those. The SDK can be used from app code to perform additional operations, such as app navigation tracking.
First, the plugin needs to be added as a dependency in the application gradle:
dependencies {
    ...
    compile 'com.castlabs.player:adobe-plugin:4.5.0'
    ...
}
This will add the Adobe plugin to the project and the plugin can be registered with the PRESTOplay SDK for Android:
AdobePlugin adobePlugin = new AdobePlugin();
PlayerSDK.register(adobePlugin);
To configure Adobe’s SDK, a JSON file with name ADBMobileConfig.json must be included
in the application’s assets directory. The file contains the information about your
Adobe account. At runtime, the Adobe SDK will read such JSON and use its configuration. For
more information on how to obtain the configuration JSON please refer to Adobe’s
documentation.
To enable the Adobe plugin, you must create it like any other plugin, and register it in the PlayerSDK:
AdobePlugin adobePlugin = new AdobePlugin(/* optional boolean for debug logging */);
PlayerSDK.register(adobePlugin);
// ...
PlayerSDK.init(getApplicationContext());
At playback time, a MediaSettings instance must be provided to the plugin, in order for it to generate
the AnalyticsMetadata instance, which will be later passed to the Player through the Intent or
the PlayerConfig when calling one of the PlayerController.open(...) methods.
The plugin will not override any of the fields in the MediaSettings, except for the
name in case it is null.
When starting playback, the MediaSettings must be provided to the plugin, via
createMetadata, in order to generate
the AnalyticsMetaData instance, which is
then passed to the open() method:
MediaSettings mediaSettings = new MediaSettings();
// Populate MediaSettings as desired
bundle.putParcelable(SdkConsts.INTENT_ANALYTICS_DATA, AdobePlugin.createMetadata(mediaSettings));
// ...
playerController.open(bundle);
Alternatively, you can also use a PlayerConfig
object and set its analyticsMetaData field:
// ...

// Set the analytics meta-data
playerConfigBuilder.analyticsMetaData(analyticsMetaData);
With this meta-data configuration in place and passed to the
PlayerController either through the
Intent Bundle or explicitly trough setAnalyticsMetaData,
the session will be automatically started and stopped.
Crash Logging
The Crashlog class can be used to hook up third party crash
reporting frameworks (such as Crashlytics). It is used throughout the SDK to
report additional data in case a crash occurs. These data are delegated to
registered CrashReporter instances.
In order to integrate a third party service, you will need to implement
the CrashReporter interface and register it using the
addReporter method.
The SDK logs the following meta data through the crash logger class:
Key |
Description |
|---|---|
CL-Playback-URL |
The current playback URL |
CL-DRM-URL |
The license server URL |
CL-DRM-Offline-Id |
The identifier used to store the offline key |
CL-DRM-RequestID |
The log request ID generated for calls to DRMToday |
CL-DRM-AssetID |
The last used asset ID |
CL-DRM-VariantID |
The last used variant ID |
CL-DRM-Type |
The last used DRM type (Widevine, Playready) |
CL-DRM-Audio-Type |
The last used DRM type for Audio tracks(Widevine, Playready) |
CL-DRM-Type |
The last used DRM type (Widevine, Playready) |
CL-DRM-Device-Level |
The security level available for the selected DRM type |
CL-Playback-State |
The current playback state |
CL-SDK-Version |
The version of the PRESTOplay SDK for Android |
CL-Playback-Video |
The dimensions of the currently played video representation |
CL-Playback-Video-Bitrate |
The bitrate of the currently played video representation |
CL-Playback-Audio-Bitrate |
The bitrate of the currently played audio representation |
CL-Playback-PositionMS |
The current playback position in milliseconds. Please note that this is updated at most with a resolution of one second. |
In addition to the meta-data, the PRESTOplay SDK for Android will log all Exceptions that
raised during playback as non-fatal errors to the Crashlog. You
can configure this behavior globally using the global
PlayerSDK.CRASHLOG_AUTO_REPORT
configuration option.
Crashlytics Integration
The SDK package bundles a plugin that can be used to setup and integrate
Crashlytics with the SDK’s Crashlog mechanism. To enable the plugin,
you will need to add it as a dependency in your project setup:
dependencies {
    ...
    compile 'com.castlabs.player:crashlytics-connector:4.5.0'
    ...
}
With the connector added to your project dependencies, you can load and register the plugin before you initialize the SDK:
Fabric.with(getApplicationContext(), new Crashlytics());
PlayerSDK.register(new CrashlyticsPlugin());
PlayerSDK.init(getApplicationContext());
Please note that the plugin does not initialize Fabric and Crashlytics for you. Before you register an instance of this plugin with the SDK, please make sure that you initialize the Fabric SDK and add at least the Crashlytics Kit.
User Agent
The PRESTOplay SDK for Android uses a custom user agent string for all network communications with our DRMtoday service and to the content provider.
You can use this information to monitor which SDK version, device model, or API are in use. As well, Castlabs compiles this information to help customers solve issues quickly and to help improve the overall quality of the service.
The parameters found on the customer User Agent are:
SDK Version: The three digit number representing the used PRESTOplay SDK for Android version.
Model: The device model.
API Version: The Android API version of the device.
ExoPlayer Library Version: The ExoPlayer library version used by the SDK.
Customer Id: An identification string for the service provider.
Device Id: The device Id as provided by the operating system.
In addition to these predefined values, you can register additional key value
pairs using the UserAgent.register() method.
These values will be stored globally and sent with each request.
Streamroot Plugin
The SDK package bundles a plugin that can be used to setup and integrate Streamroot DNA multi-source content delivery solutions. To enable the plugin, you will need to add it as a dependency in your project setup:
dependencies {
    ...
    compile 'com.castlabs.player:streamroot-plugin:4.5.0'
    ...
}
The example above integrates the plugin as a dependency. You can now register it with the SDK:
public class MyApp extends Application {
    @Override
    public void onCreate() {
        super.onCreate();

        PlayerSDK.register(new StreamrootPlugin(
            "backend_url",
            this
        ));

        PlayerSDK.init(getApplicationContext());
    }
}
The streamrootKey is now set as a meta-data in the application manifest.
<manifest package="com.castlabs.sdk.streamroot_demo" xmlns:android="http://schemas.android.com/apk/res/android">
   <application>
       <meta-data android:name="io.streamroot.dna.StreamrootKey" android:value="your_streamroot_key"/>
After the plugin is registered, the player will use Streamroot DNA to create manifest and segments proxy.
Streamroot Plugin requires Java 8 to operate. Streamroot SDK is built with a support range going from Android 19 (4.4 KitKat) to Android 27 (8.0 Oreo). (for more details please check Streamroot DNA Support <https://support.streamroot.io/>)
OkHttp Plugin
If you want to use the popular OkHttp Library, the SDK bundle contains a plugin that you can use to integrate OkHttp into the player.
To use the plugin, you need to integrate it as a dependency into you Application build and register the plugin with the SDK:
dependencies{
     ...
     compile 'com.castlabs.player:okhttp-plugin:4.5.0'
     ...
}
The example above integrates the plugin as a dependency. You can now register it with the SDK:
public class MyApp extends Application {
    @Override
    public void onCreate() {
        super.onCreate();

        PlayerSDK.register(new OkHttpPlugin());
        PlayerSDK.init(getApplicationContext());
    }
}
After the plugin is registered, the player will use OkHttp to create HTTP requests to manifests and content.
Intercept Traffic
OkHttp can be also used for debugging purposes to intercept and show the network traffic. Please note that you should not deploy this in production when you publish your Application. This is a tool used for development and debugging purposes. You can find more information about Stetho, the library used for this, on their Website.
In order to use the network interceptor, you will need to add additional dependencies to the Stetho library and its OkHttp integration:
dependencies{
     ...
     compile 'com.castlabs.player:okhttp-plugin:4.5.0'
     compile 'com.facebook.stetho:stetho:1.3.1'
     compile 'com.facebook.stetho:stetho-okhttp3:1.3.1'
     ...
}
With these dependencies in place, you can setup the plugin using the network interceptor:
public class MyApp extends Application {
    @Override
    public void onCreate() {
        super.onCreate();

        PlayerSDK.register(new OkHttpPlugin(
             new OkHttpClient.Builder().addNetworkInterceptor(
                 new StethoInterceptor())));
        PlayerSDK.register(new OkHttpPlugin());
        PlayerSDK.init(getApplicationContext());
    }
}
The OkHttp plugin allows you to pass a pre-configured builder in its’ constructor. We use that to pass in a builder configured to interecept network traffic using Stetho.
Using this extended setup allows you to use your local chrome development tools to intercept and show network traffic. For that, run the Application on a device connected via USB, start chrome and open a tab on chrome://inspect/#devices. Enable USB discovery and you will see you Application listed. You can now inspect the network traffic of your application.
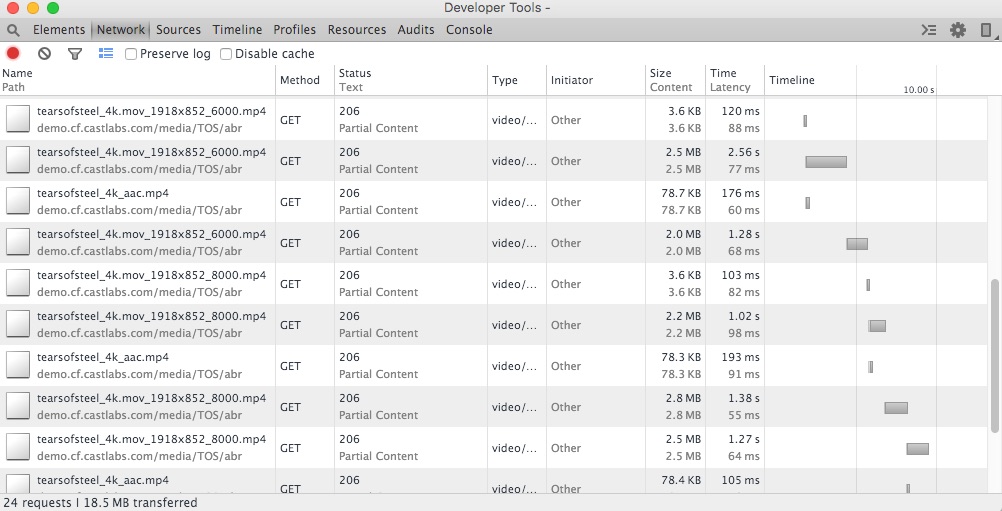
Network traffic inspection with Chrome Dev Tools and Stetho
Idle connection eviction
While usually there’s no need to handle connections at this level, it’s possible to evict all idle connections held by OkHttp. This might be of interest to save server resources if connections are kept alive by it for a very long time:
.. code-block:: java
playerController.release();
// Evict idle connections final OkHttpPlugin okHttpPlugin = PlayerSDK.getPlugin(OkHttpPlugin.class); okHttpPlugin.evictIdleConnections();
Thumbnails
Since version 4 of the PRESTOplay SDK for Android, the bundle contains the Thumbnail plugin. This plugins adds support to load and display scrubbing thumbnails in various formats.
The plugin is distributed with the SDK and you can add it as a dependency:
dependencies {
    ...
    compile 'com.castlabs.player:thumbs-plugin:4.5.0'
    ...
}
Once added you can register it with the SDK:
public class MyApp extends Application {
    @Override
    public void onCreate() {
        super.onCreate();

        PlayerSDK.register(new ThumbsPlugin(true));
        PlayerSDK.init(getApplicationContext());
    }
}
Note that we pass true as the constructor argument here. This will add
the default view that can be used for basic rendering on top of
a PlayerView. You can find more about the parameter in the API
documentation for ThumbsPlugin.
The plugin supports the following formats:
BIF Containers
WebVTT index
Single or gridded JPG files with a template URL
DASH in-stream thumbnails
Loading strategy
In order to improve the user experience. The Thumbnail plugin also allows for smarter preloading
approaches. This is achieved through the LoadingStrategy
class.
By default, thumbnail load will start whenever the first thumbnail is requested. It is possible
to configure this behaviour so that loading starts immediately, or after a delay following playback
start. This can be configured by providing a delay:
Builder.loadStartDelayMs(long).
A loading strategy defines loading “waves”. These waves only load a subset of all the available thumbnails for an asset. The goal being to spread out the thumbnails and to be able to provide a reasonable thumbnail for any media time in a short time.
A more spaced-out Wave will load fewer thumbnails and finish preloading faster, but will provide less accurate thumbnails. A less spaced Wave will provide more accurate thumbnails but takes longer to complete.
The plugin already uses a Wave-based approach for preloading by default. Such default consists of 3 waves which will preload thumbnails in 1-minute intervals, followed by 15-second intervals followed by all thumbnails.
A custom LoadingStrategy can be defined upon plugin creation. The following example defines four
waves:
public class MyApp extends Application {
    @Override
    public void onCreate() {
        super.onCreate();

        final ThumbsPlugin plugin = new ThumbsPlugin(true);
                plugin.setLoadingStrategy(new LoadingStrategy.Builder()
                        .loadStartDelayMs(0) // Start loading immediately
                        .addPercentageWave(0.10f)
                        .addTimeWave(1, TimeUnit.MINUTES)
                        .addTimeWave(20, TimeUnit.SECONDS)
                        .addStepWave(1)
                .get());

        PlayerSDK.register(plugin);
        PlayerSDK.init(getApplicationContext());
    }
}
Note that waves are processed sequentially in addition order, so they should be defined in ascending “density” order, ie. waves which will preload more thumbnails should be added last.
This can also be achieved by setting a different loading strategy at runtime, before opening the Player:
final ThumbnailProvider thumbs = playerController.getComponent(ThumbnailProvider.class);

thumbs.setLoadingStrategy(new LoadingStrategy.Builder()
            .loadStartDelayMs(0) // Start loading immediately
            .addPercentageWave(0.10f)
            .addTimeWave(1, TimeUnit.MINUTES)
            .addTimeWave(20, TimeUnit.SECONDS)
            .addStepWave(1)
        .get());

playerController.open(...);
For more details check the documentation of the LoadingStrategy class.
Disk cache configuration
On-disk caching for thumbnails can be globally controlled via the thumbnails plugin. The cache mode defines whether thumbnail bytes are written to disk and if cached files are cleaned up when the provider is disposed during player release.
The default is to disable on-disk caching.
// Configure once during app startup or before opening content
ThumbsPlugin.setDiskCacheMode(ThumbsPlugin.DiskCacheMode.DISABLED);          // no disk cache
// or
ThumbsPlugin.setDiskCacheMode(ThumbsPlugin.DiskCacheMode.ENABLED_CLEANUP);   // cache + clean on release
// or
ThumbsPlugin.setDiskCacheMode(ThumbsPlugin.DiskCacheMode.ENABLED_RETAIN);    // cache + retain across releases
Modes:
DISABLED: Do not write thumbnails to disk (memory-only). This avoids any file deletions during player release.ENABLED_CLEANUP: Write thumbnails to disk and synchronously delete cached files when the associated provider is disposed on release (previous default behavior).ENABLED_RETAIN: Write thumbnails to disk and keep cached files on release (no cleanup on release). Note that even if the cached files are not actively cleared, they will eventually be cleared at the system’s discretion.
Notes:
This setting affects default thumbnail loader creation by the SDK and is effective for embedded and sideloaded thumbnails when no custom loader factory is provided.
Standalone thumbnail providers created via
StandaloneThumbnailFactorydefault to no disk cache.
Network Configuration
The NetworkConfiguration
can be used to specify the timeouts for the thumbnail downloads.
The following example shows how you can achieve this:
bundle.put(SdkConsts.INTENT_NETWORK_CONFIGURATION, new NetworkConfiguration.Builder()
    // You can specify the timeouts for the thumbnails
    .thumbnailConnectionTimeoutMs(500)
    .thumbnailReadTimeoutMs(500)
    .get());
Embedded
For embedded thumbnails, such as in a DASH in-stream thumbnails, there’s no additional action required. The SDK will automatically load the thumbnails defined in AdaptationSets onto the Player Model. You still need to control how those will be rendered, which is detailed in the section Using the built-in thumbnails view.
Side-loaded
You can start loading thumbnail data directly if you registered the plugin and you are loading
your streams through an Intent Bundle (see Starting Playback from an Intent).
You need to create an instance of SideloadedTrack and add it to your intent bundle
using the SdkConsts.INTENT_SIDELOADED_TRACKS_ARRAYLIST key. For example:
ArrayList<SideloadedTrack> data = new ArrayList<SideloadedTrack>(){{
    add(new SideloadedTrack.ThumbnailBuilder()
            .url("thumbs/thumbs.vtt")
            .thumbnailType(ThumbnailDataTrack.TYPE_WEBVTT_INDEX)
    .get());
}}
...
intent.putParcelableArrayList(SdkConsts.INTENT_SIDELOADED_TRACKS_ARRAYLIST, data);
The ThumbnailBuilder also provides methods for configuring extra fields necessary for other
thumbnail formats, such as gridded JPEG template:
ArrayList<SideloadedTrack> data = new ArrayList<SideloadedTrack>(){{
    add(new SideloadedTrack.ThumbnailBuilder()
            .url("http://example.com/content/thumbs/$index$.jpg")
            .gridHeight(4)
            .gridWidth(5)
            .thumbnailType(ThumbnailDataTrack.TYPE_JPEG_TEMPLATE)
            .intervalMs(10_000)
    .get());
}}
...
intent.putParcelableArrayList(ThumbsPlugin.INTENT_SIDELOADED_TRACKS_ARRAYLIST, data);
This will create a data object and add it to the intent. Note that we are specifying the type explicitly here. This is not strictly necessary and the plugin will try to infer the type from the URL extension, i.e. .vtt vs. .bif vs. .jpg.
With the data object added to the intent, an implementation of
ThumbnailProvider
will be created automatically and is exposed as a component of the
PlayerController. You can access the provider instance using
PlayerController.getComponent().
For example:
ThumbnailProvider provider = playerController.getComponent(ThumbnailProvider.class);
The ThumbnailProvider interface is the main
interaction point to get access to thumbnails. It provides
a getThumbnail method that asynchronously loads a thumbnail for the
requested position and provides it back the callback implementation that
is passed to the method. It supports performing multiple concurrent getThumbnail calls.
Thumbnails can also be requested with a time tolerance. Check the
Thumbnail rendering time tolerance section for more details.
At this point a view implementation can use the provider and a callback to get a handle on the Bitmap and show it on screen. The PRESTOplay SDK for Android already bundles a simple view implementation with a relatively flexible way to render and position a thumbnail.
Using the built-in thumbnails view
If you registered the thumbnails plugin and enabled the usage of the
internal view component, you do not need to create a view or interact with
the provider explicitly. Instead, you add your ThumbnailData to the
Intent Bundle and once a PlayerView is initialized, you can access the
thumbnail view component and show or hide thumbnails on to of your player
view.
In order to properly render the thumbnails, you’ll need to register a
SeekBarListener to the
PlayerControllerView. This listener will be invoked whenever there’s a scrubbing event on
the Seekbar, so you can implement your logic regarding thumbnail rendering.
You can also specify a third parameter to fine-tune which Thumbnail should be fetched in relation to the requested time. More info about this parameter is available in the Thumbnail index selection section.
Here you can see a sample implementation.
public void onSeekbarScrubbed(long positionUs, double seekBarProgressPercent) {
    ThumbsPlugin.ThumbnailViewComponent thumbsView = playerView.getComponent(
            ThumbsPlugin.ThumbnailViewComponent.class);
    if (thumbsView != null){
        thumbsView.show(positionUs, new DefaultThumbnailView.Callback() {
            @Override
            public void getThumbnailRect(Rect output, DefaultThumbnailView.ThumbnailInfo info, boolean isSmallScreen) {
                ViewGroup videoView = playerView.getVideoView();
                output.set(
                        videoView.getLeft(),
                        videoView.getTop(),
                        videoView.getRight(),
                        videoView.getBottom());
            }
        }, ThumbsPlugin.THUMBNAIL_INDEX_CURRENT);
    }
}

@Override
public void onSeekbarReleased() {
    final ThumbsPlugin.ThumbnailViewComponent thumbsView = playerView.getComponent(
            ThumbsPlugin.ThumbnailViewComponent.class);
    if (thumbsView != null){
        thumbsView.hide();
    }
}
The example above demonstrates the basic interactions with the
ThumbnailViewComponent. Here we assume we have to methods, one that is
called when a Seekbar is scrubbed and thumbnails should be shown, and the
counterpart that is triggered when scrubbing stops and the thumbnails
should be hidden. Hiding is relatively simple and a matter of calling the
hide() method. Showing the thumbnails is slightly more complex. We
call the show() method and pass two parameters: the time in
microseconds for which we would like to receive a thumbnail and
a Callback implementation. The callback is triggered once the Bitmap
data are loaded. It its called with size information about the thumbnail
as well as an output rectangle. The output rectangle needs to be
filled with the coordinates and size of the desired thumbnail. The
coordinates are relative to the thumbnail view container, but the default
view container has the same dimensions as the player view. The example
above uses the exposed video view to place the thumbnail image full-screen
above the video, but treat this as a simple example. You can use the
output rectangle to customize the size and the position of the
resulting thumbnail.
The returned Thumbnail might not be the corresponding one for the requested
position, as the DefaultThumbnailView uses the getThumbnail API
defining some tolerance. It is recommended that this is the behaviour used
as it improves the perceived responsibility. Nevertheless, this is a configurable
setting on the DefaultThumbnailView and you may change it through
DefaultThumbnailView.setThumbnailTolerance(long).
The DefaultThumbnailView will automatically be created if you use a PlayerView.
If you don’t want to use a PlayerView but still decide to use the DefaultThumbnailView
available in the PRESTOplay SDK for Android, you can create it yourself, either programmatically or by defining it in
an xml layout file.
If you use the latest approach, you must pass your layout View to PlayerController.setComponentView(int, android.view.View)
with the corresponding id, defined in PRESTO_DEFAULT_THUMBNAIL_VIEW,
or R.id.presto_default_thumbnail_view so the ThumbsPlugin can properly find the DefaultThumbnailView.
Thumbnail rendering time tolerance
In order to benefit from the several loading Waves approach, the ThumbsPlugin provides an API
to return a close neighbour of the desired thumbnail if its data is already available.
This tolerance represents the maximum difference of time time between the position of the requested thumbnail and that of a potentially already-loaded thumbnail in the index. If a matching nearby thumbnail with data within the specified tolerance is found, it will be returned immediately. Otherwise, the exact thumbnail will be scheduled for fetching.
By default, the DefaultThumbnailView performs thumbnail requests with some tolerance, which
can be changed through DefaultThumbnailView.setThumbnailTolerance(long).
If you’re performing direct thumbnail requests through a ThumbnailProvider, you can specify
a tolerance with the ThumbnailProvider.getThumbnail(long, com.castlabs.sdk.thumbs.ThumbnailProvider$Callback, int, long) method.
Thumbnail index selection
When using the ThumbnailViewComponent, it’s possible to pass a third parameter to the
show() method
in order to determine which Thumbnail should be returned, relative to the requested media time.
There are three possible values:
ThumbsPlugin.THUMBNAIL_INDEX_CURRENT: This corresponds to the thumbnail with the highest media time that is lower than the requested position.ThumbsPlugin.THUMBNAIL_INDEX_NEXT: This corresponds to the thumbnail with the lowest media time that is higher than the requested position.ThumbsPlugin.THUMBNAIL_INDEX_CLOSEST: This corresponds to the thumbnail with the lowest difference between its media time and the requested position.
The following scheme can better illustrate the behaviour. The example assumes Thumbnails are available
every 10 seconds, starting from the beginning (media time 0). The top marker represents the requested
time, that being the first parameter to the ThumbnailViewComponent.show(...) call, and the ones
below the timeline, the Thumbnail times for each indexing type:
Requested Thumbnail for position 4

          0   v     10        20        30
Return    |---------|---------|---------|-----
Current:  ^
Closest:  ^
Next:               ^


Requested Thumbnail for position 6

          0     v   10        20        30
Return    |---------|---------|---------|-----
Current:  ^
Closest:            ^
Next:               ^


Requested Thumbnail for position 18

          0         10      v 20        30
Return    |---------|---------|---------|-----
Current:            ^
Closest:                      ^
Next:                         ^
Downloader integration
The thumbnails plugin is integrated with the Downloader Plugin, hence
there is offline support for thumbnails as well. This is currently limited
to BIF and WebVTT thumbnails. Just add the ThumbnailData to the
Intent that is used to initiate the download and the thumbnails will be
fetched and downloaded as well. When you start the local playback, pass
the same ThumbnailData to the local playback intent. The player will
translate any remote URLs automatically to the correct local files and
relative URLs will still resolve correctly, now relative to the local
manifest.
Thumbnail loading details
The thumbnail plugin can preload thumbnails in the background in order for them to be ready as much a possible whenever a request comes in.
The background loader is multi-threaded, and the number of threads is configurable
through the ThumbsPlugin.setThumbnailLoadThreads(int) static method.
Whenever a specific thumbnail request (either by asking the DefaultThumbnailView to show
a thumbnail for a time, or through one of the getThumbnail methods) is issued, it will skip the
pending queue of background thumbnail loads in order to be as responsive as possible. Successive
specific requests will be queued and executed in a FIFO fashion. To clear this queue of pending
specific thumbnail requests, the following method can be used: ThumbnailProvider.cancelPendingRequests().
Standalone Thumbnail providers
It is possible to obtain an instance of a ThumbnailProvider without using a
PlayerController instance which will allow for fetching thumbnails independently of
any ongoing playback, even for completely different content.
In order to obtain a StandaloneThumbnailProvider to fetch embedded DASH thumbnails use StandaloneThumbnailFactory.getProvider:
StandaloneThumbnailProvider provider = StandaloneThumbnailFactory.getProvider(
    new PlayerConfig.Builder("https://example.com/manifest.mpd").get());

// Add Broadpeak support if needed
provider.addExtension(new BroadpeakSdkElementExtension());

// Fetch thumbnails
Future<ThumbnailProvider.ThumbnailResult> thumbnailResultFuture = provider.getThumbnail(30_000_000L, ThumbsPlugin.THUMBNAIL_INDEX_CURRENT);
Bitmap thumbnailBitmap = thumbnailResultFuture.get().thumbnail;

// Free up resources
provider.destroy();
In case the provided DASH manifest is a live stream manifest updates will be performed in the background
resulting in the thumbnail index also being updated alongside. To get updates of this process it is
possible to register a IndexRefreshListener:
provider.addIndexRefreshListener(new ThumbnailProvider.IndexRefreshListener() {
    @Override
    public void onIndexRefreshed(@NonNull ThumbnailProvider provider) {
        // Index has been refreshed. Fetch thumbnail for a given time
        Future<ThumbnailProvider.ThumbnailResult> thumbRequest = provider.getThumbnail(position, ThumbsPlugin.THUMBNAIL_INDEX_CURRENT);
    }
});
It is also possible to get thumbnails out of a VTT or JPG Template SideloadedTrack:
StandaloneThumbnailProvider provider = StandaloneThumbnailFactory.getProvider(new SideloadedTrack.ThumbnailBuilder()
            .url("https://demo.castlabs.com/media/QA/tos_thumbs/$index$.jpg")
            .gridHeight(1)
            .gridWidth(1)
            .thumbnailType(ThumbnailDataTrack.TYPE_JPEG_TEMPLATE)
            .intervalMs(5_000)
        .get());
360-Degree Playback Plugin
The PRESTOplay SDK for Android can be used with the optional 360 Degree player plugin to enable 360 playback using the PRESTOplay SDK for Android.
The plugin is distributed with the PRESTOplay SDK for Android. You can reference and load the 360 plugin as a separate dependency:
dependencies {
    ...
    compile 'com.castlabs.player:360-plugin:4.5.0'
    ...
}
Before you can use this plugin, you have to register it before you initialize the SDK:
public class MyApp extends Application {
    @Override
    public void onCreate() {
        super.onCreate();

        PlayerSDK.register(new ThreesixtyPlugin());
        PlayerSDK.init(getApplicationContext());
    }
}
Google Cardboard
The PlayerView360 is an extension of the
default PlayerView. You can add it as a view component to your own activity. The view exposes the
underlying GvrView which needs to be passed to the Google VR SDK in your activity.
You can use the PlayerView360 in your own Activity (that usually extends GvrActivity). The PlayerView360 will handle all the transformations required to render the view.
An example of this is the CardboardActivity class in the ‘threesixty_demo’ sample app.
Google cast Manager
The PRESTOplay SDK for Android contains the GoogleCastManager
class that will ease the process of starting and managing remote cast session.
This class allows to start a cast session, get the current remote player state and select audio, video and subtitle tracks.
AndroidX Media2
MediaSessionPlugin integrates PRESTOplay SDK for Android with AndroidX Media2 Session APIs providing easy to use Media2
functionality. The application does not need to create and maintain MediaSession instance, it is only
responsible for Media Session lifecycle i.e. when Media Session is created and optionally when it is destroyed.
First, MediaSessionPlugin shall be enabled before PRESTOplay SDK for Android initialization:
public class MyApp extends Application {
    @Override
    public void onCreate() {
        super.onCreate();

        PlayerSDK.register(new MediaSessionPlugin());
        PlayerSDK.init(getApplicationContext());
    }
}
Registering the plugin does not create Media Session yet and the application will need to explicitly
request its creation by calling MediaSessionPlugin.enableMediaSession(). Media Session is linked
to the PlayerController and therefore the application has to provide
PlayerController instance
when enabling Media Session. MediaSessionPlugin
supports both PlayerController and
SingleControllerPlaylist instances.
Media Session can be enabled any time before or after opening the playback and the only constraint is the presence of a valid
PlayerController instance.
The code below enables Media Session when PlayerController
is created and before the playback is opened:
public class SimplePlaybackDemo extends Activity {
    @Override
    protected void onCreate(Bundle savedInstanceState) {
        // ...
        PlayerView playerView = (PlayerView) findViewById(R.id.player_view);

        MediaSessionPlugin.enableMediaSession(playerView.getPlayerController());

        // ...
        PlayerConfig playerConfig;
        // playerConfig = ...
        playerController.open(playerConfig);
    }

    @Override
    protected void onResume() {
        super.onResume();
        // ...
        PlayerView playerView = (PlayerView) findViewById(R.id.player_view);

        MediaSessionPlugin.enableMediaSession(playerView.getPlayerController());
        playerView.getLifecycleDelegate().resume();
    }
}
Media Session is closed automatically upon PlayerController.destroy(). However,
it is also possible to close Media Session explicitly:
// ...
PlayerView playerView = (PlayerView) findViewById(R.id.player_view);
MediaSessionPlugin.disableMediaSession(playerView.getPlayerController());
// ...
MediaSession can also be customized according to the application needs e.g. default seek values or callbacks can be installed:
final MediaSessionBuilder mediaSessionBuilder = new MediaSessionBuilder()
                    .setFastForwardIncrementMs(10000)
                    .setRewindIncrementMs(10000);
// ...
MediaSessionPlugin.enableMediaSession(playerView.getPlayerController(), mediaSessionBuilder);
// ...
Drm Device Time Checker
The PRESTOplay SDK for Android contains the DrmDeviceTimeCheckerPlugin
Plugin which is able to perform periodic checks related to DRM licensing in order to minimize some
Widevine limitations.
The plugin is distributed with the PRESTOplay SDK for Android. You can reference and load the Device Time Checker plugin as a separate dependency:
dependencies {
    ...
    compile 'com.castlabs.player:drm-device-time-checker-plugin:4.5.0'
    ...
}
Before you can use this plugin, you have to register it before you initialize the SDK:
public class MyApp extends Application {
    @Override
    public void onCreate() {
        super.onCreate();

        PlayerSDK.register(new DrmDeviceTimeCheckerPlugin());
        PlayerSDK.init(getApplicationContext());
    }
}
Optionally, you can specify the time period at which he license checks should be performed. Default value is every 5 minutes.
// ...
PlayerSDK.register(new DrmDeviceTimeCheckerPlugin(60)); // Check every minute
// ...
This plugin needs two extra Android permissions. These permissions allow to internally keep track of license times.
These permissions are automatically added to your AndroidManifest file once you include this plugin in your build file.